Saturday, December 29, 2012

ROM Manager Premium v5.5.1.4

Details

PLAY STORE

Free Download

MIRROR1

MIRROR2

MIRROR3

HOW TO ROOT THE SAMSUNG GALAXY NOTE 2 [GT-N7100/GT-N7105]

Users of the Samsung Galaxy Note 2 GT-N7100 and GT-N7105 have an awesome treat waiting for them from XDA Developers member Chainfire.  If you own a Galaxy Note 2, you can now root it easily through Chainfire’s CF-Auto-Root package.

According to the dev himself, this package will only root the phablet, but not tamper its recovery.  In fact, you’ll be getting SuperSU (both binary and APK) and retain stock recovery on your phablet.

Chainfire’s previous rooting packages, known as CF-Root, were known for the ease with which they can be flashed onto a phone.  CF-Auto-Root is no different.  The instructions are simple and easy to follow. Just make sure to check your phone’s model before you attempt this procedure.

This guide shows you how to root the Samsung Galaxy Note 2.

Warning

The instructions in this guide are intended for use with the Samsung Galaxy Note 2, model number GT-N7100 or GT-N7105. Applying these instructions on another device or model may produce undesired outcomes.
The method described in this guide will increment your phone’s binary flash counter.
The information in this guide is provided for instructional and educational purposes only. There is no guarantee that these instructions will work under your specific and unique circumstances.
Use these instructions at your own risk. We shall not hold any responsibility or liability for whatever happens to you or your device arising from your use of the info in this guide.
Read and understand the whole guide first before actually performing the instructions.
Requirements

Samsung Galaxy Note 2 GT-N7100 or GT-N7105
A Windows PC
Handset USB drivers installed on the PC. You may install the drivers by installing Samsung Kies.
Enable USB debugging on your handset.
Disable antivirus, firewall, and other security software. Also disable Samsung Kies and other software that accesses your phone. Such software can interfere with the procedure in this guide.
Odin3 v3.04 (Odin3_v3.04.zip, 457 kB)
CF-Auto-Root for your phone variant:
GT-N7100 — CF-Auto-Root-t03g-gtn7100.zip (12.0 MB)
GT-N7105 — CF-Auto-Root-t0lte-gtn7105.zip (13.1 MB)
Make sure your device’s battery still has at least 70% power. You don’t want the device to shut down in the middle of the procedure.
Backup all personal data on your phone to make sure you have a copy of your personal data (e.g., contacts, SMS, MMS, Internet settings, Wi-Fi passwords, and the like) in case the procedure in this guide erases such data.
Instructions

1.Extract Odin3_v3.04.zip into a folder on your computer. You will find the Odin3 v3.04.exe file together with other system files inside the folder.

2.Unzip the CF-Auto-Root-*.zip file to obtain a *.tar.md5 file. You will need it when running Odin later on.

3.Turn off your phone.

4.Boot your phone to Download Mode by holding down the Volume Down, Home, and Power buttons at the same time.  When you see the warnings screen, press Volume Up to continue to Download Mode.

5.Launch Odin on your PC.

6.Connect your phone to your PC using your USB cable. An Added! message will appear on the message box at the bottom-left corner of the Odin window.

7.Click on PDA and select the *.tar.md5 file you extracted from the ZIP file earlier. Do not make any other changes aside from this.

8.Click the Start button in Odin to begin. You will get a “Pass” message at the top-left part of the tool window when you have successfully installed CF-Auto-Root. Your phone will automatically reboot once the installation is done.

9.Only unplug your phone from your PC after you see the “Pass” message in Odin.

Great job! You now successfully rooted your Samsung Galaxy Note 2 GT-N7100/GT-N7105.

Skype 3.0.0.6181 Modded (build v18.1)

PLAY STORE

Download

Mirror1

Mirror2

Thursday, August 9, 2012

FACEBOOK UPDATE

PowerAMP Music Player v2.0.5-build-473 Full

Requirements: Android v2.1+

Overview: Poweramp is a powerful music
player for Android.

Key Features:
- plays mp3, mp4/m4a (including alac),
ogg, wma*, flac, wav, ape, wv, tta, mpc,
aiff (* some wma pro files may require
NEON support)
- 10 band optimized graphical equalizer
for all supported formats, presets, custom
presets
- separate Bass and Treble adjustment
- stereo eXpansion, mono mixing, balance
- crossfade
- gapless
- replay gain
- plays songs from folders and from own
library
- dynamic queue
- lyrics support, including lyrics search via
musiXmatch plugin
- embed and standalone .cue files
support
- support for m3u, m3u8, pls, wpl
playlists
- OpenGL based cover art animation
- downloads missing album art
- 4 configurable widget types
- configurable lock screen with optional
Direct Unlock
- headset support, automatic Resume on
headset and/or BT connection (can be
disabled in settings)
- scrobbling
- tag editor
- visual themes, including support for
external/3rd party skins
- fast library scan
- high level of customization via settings

What's in this version:
2.0.5-build-473 (see 1st post for the
links)
- HTC Beats/SRS support
- enabled DSP features are now displayed
under equalizer curve
- Poweramp now reshuffles list on repeat
- fixed few ICS-related Poweramp issues
- multichannel FLACs
- option to search for album art based on
just title/filename
- Korean translation (beta)
- few other bug fixes and stability
improvements

Proper Install note:
1. Install PowerAMP.2.0.4-buil.apk (Don't
run!)(Clear Data)
2. Install PowerAMPunlocker.apk (Don't
run!)
3. Install
PowerAmpPatcher.1.4.by.ChelpuS.apk
(Run and patch!)
4. Run PowerAMP.2.0.4 and wifi enable
and get License Key ;
5. Run Poweramp.2.0.4 and Check License
Status in Options (places without
notification of license = true license)
6. (Dont Clear Data) Install
PowerAMP.2.0.5-buil.apk
7. Run Poweramp.2.0.5 and Check License
Status in Options (places without
notification of license = true license)
8. Uninstall Patch.

Note:
you need login Android market!
All credit to Chelpus

Download Instructions:

filemarkets

bulletupload

uploading

Zippyshare


Sunday, July 8, 2012

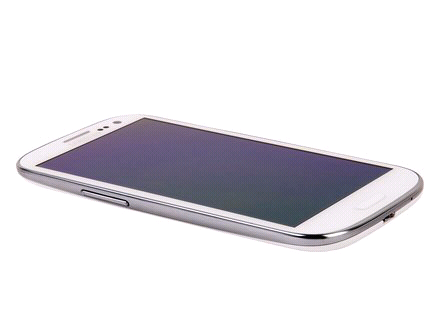
Samsung Galaxy S3 GT-I9300: How to root and flash ClockworkMod Recovery

Now that you’ve got a Samsung Galaxy S3 GT-I9300 or GT-I9300T, you must be itching to personalize it with custom ROMs and other mods, hacks, and tweaks. Before you can do that, however, you have to first gain root access on your phone and if you want easy ROM installation, you have to install a custom recovery.
Doing those could be complicated, not to mention very risky–but not anymore! There is now an easier and faster way to root your device and install Clockworkmod Recovery at the same time. The tool is called CF-Root 6.3.
Just after the release of the new Samsung Galaxy S3, recognized XDA Developers member Chainfire posted a method on how to root the device. The said method was effective enough to root the device, but some users found it very complicated and confusing, not to mention that it didn’t include ClockworkMod Recovery.  That earlier method employed flashing an insecure kernel prior to installing root and SuperSU.
This time, Chainfire came up with a new rooting package called CF-Root 6.3, which makes the rooting process easier than the previous one. All you need to do is to flash the package on your phone via Odin and it’s done.
It’s also better because flashing the package also automatically installs ClockworkMod Recovery, SuperSU (root access manager), and the ClockworkMod Recovery Manager app. It’s definitely the most recommended way to gain root access on your Galaxy S3 because it’s faster, easier, and safer.
If you want to flash this package on your phone, see the requirements and instructions below.
Disclaimer
The instructions in this guide are intended for use of Samsung Galaxy S3, model numbers GT-I9300 and GT-I9300T. Applying these instructions on another device or model may produce undesired outcomes.
The information in this guide is provided for instructional and educational purposes only. There is no guarantee that these instructions will work under your specific and unique circumstances.
Use these instructions at your own risk. We shall not hold any responsibility or liability for whatever happens to you or your device arising from your use of the info in this guide.
Read and understand the whole guide first before actually performing the instructions.
Requirements
Samsung Galaxy S3 GT-I9300 or GT-I9300T
A Windows PC
Phone drivers installed on the PC.  You can get the drivers by installing Samsung Kies. Or, get them from any of these links: 32 bit(x86)-Windows |64 bit(x64)-Windows .
Enable USB debugging on your phone.
Disable system tools such as firewall program, anti-virus software, and Samsung KIES to avoid interruptions throughout the procedure.
Backup all personal data on your phone to make sure you have a copy of your personal data (e.g., contacts, SMS, MMS, Internet settings, Wi-Fi passwords, and the like) in case the procedure in this guide erases such data.
Make sure that your battery has sufficient power (at least 50%) to avoid interruption due to power loss.
Download the following to your computer.
Odin3 v-1.85 (Odin3-v1.85.zip, 198 kB
Cf-Root 6.3 (CF-Root-SGS3-v6.3.zip, 7.1 MB)
Instructions
Extract CF-Root-SGS3-v6.3.zip to your computer and you will get CF-Root-SGS3-v6.3.tar.
Extract the Odin3-v1.85.zip file into a folder on your computer to get Odin3-v1.85.exe. We recommend you extract it to the Desktop where you can easily find it.
Turn off your phone.
Put your Samsung Galaxy S3 into Download Mode by pressing the Volume Down key, Home button (middle key), and Power button together, then press the Volume Up button right after the screen turns on to finally enter Download Mode.
Connect your Samsung Galaxy S3 to your computer via USB cable.
Go to the folder where you extracted Odin3-v1.85.zip and double-click Odin3-v1.85.exe to launch Odin on your computer.  You will know when Odin recognizes your phone if you see an “Added” message in its lower-left message box. If your phone is not recognized, there is something wrong with the installation of the drivers, so disconnect the phone and re-install them.
In Odin, click the PDA button and select the CF-Root-SGS3-v6.3.tar file that you have downloaded earlier.
Under Options, make sure that “Repartition” is not checked.
Click the Start button in Odin3 to flash CF-Root 6.3 on your Samsung Galaxy S3 and wait for it to finish.
Once the flashing is done you will get a “PASS” message with a green background on Odin, indicating that flashing is successful.  You may disconnect your phone from the computer at this point.
Your phone will automatically reboot into ClockworkMod Recovery and the rooting procedure will begin, after which your phone will reboot once more into Normal Mode.  If the phone doesn’t boot into ClockworkMod Recovery, it’s possible that the rooting process failed.  In that case, go through the steps again starting at step 3.
Great! You have successfully rooted your Samsung Galaxy S3 GT-I9300 or GT-I9300T and flashed ClockworkMod Recovery. You can now flash custom ROMs on your phone.

32 bit-Windows-x86

Samsung Galaxy S3 GT-I9300: Flashing CyanogenMod 9 nightly builds

The Samsung Galaxy S3 GT-I9300 is the newest phone in the Galaxy series. The phone already packs sweet Android 4.0 Ice Cream Sandwich (ICS), topped by the latest TouchWiz UI from Samsung. And, when it comes to stock ROMs, we can always expect bloatware apps to come pre-installed on the phone.
If you want to experience pure ICS with those bloatware apps removed, try installing CyanogenMod 9 on your mobile phone.
CyanogenMod 9 (CM9) is a custom ROM based on Android 4.0 Ice Cream Sandwich with a few modifications on board. Although you can enjoy a pure ICS user interface, the ROM for the Galaxy S3 is still in its nightly build stage and contains a few bugs and issues, such as the FM radio not working, bad voice quality during calls, and not being able to wake the phone using the Volume keys.
Nevertheless, you can still enjoy a pure and enhanced Android OS right on your mobile phone. Read on to learn how to flash the CyanogenMod 9 nightly ROM to your Samsung Galaxy S3 GT-I9300.
Warning
The instructions in this guide are intended for use with the Samsung Galaxy S3, model number GT-I9300. Applying these instructions on another device or model may produce undesired outcomes.
The information in this guide is provided for instructional and educational purposes only. There is no guarantee that these instructions will work under your specific and unique circumstances.
Use these instructions at your own risk. We shall not hold any responsibility or liability for whatever happens to you or your device arising from your use of the info in this guide.
Read and understand the whole guide first before actually performing the instructions.
Requirements
A Samsung Galaxy S3 GT-I9300 with ClockworkMod Recovery installed
Plz visit this link for download/CM9 Rom FLASH instructions and FULL details:

http://ilmgear.com/?p=197

THANKS!