Now that you’ve got a Samsung Galaxy S3 GT-I9300 or GT-I9300T, you must be itching to personalize it with custom ROMs and other mods, hacks, and tweaks. Before you can do that, however, you have to first gain root access on your phone and if you want easy ROM installation, you have to install a custom recovery.
Doing those could be complicated, not to mention very risky–but not anymore! There is now an easier and faster way to root your device and install Clockworkmod Recovery at the same time. The tool is called CF-Root 6.3.
Just after the release of the new Samsung Galaxy S3, recognized XDA Developers member Chainfire posted a method on how to root the device. The said method was effective enough to root the device, but some users found it very complicated and confusing, not to mention that it didn’t include ClockworkMod Recovery. That earlier method employed flashing an insecure kernel prior to installing root and SuperSU.
This time, Chainfire came up with a new rooting package called CF-Root 6.3, which makes the rooting process easier than the previous one. All you need to do is to flash the package on your phone via Odin and it’s done.
It’s also better because flashing the package also automatically installs ClockworkMod Recovery, SuperSU (root access manager), and the ClockworkMod Recovery Manager app. It’s definitely the most recommended way to gain root access on your Galaxy S3 because it’s faster, easier, and safer.
If you want to flash this package on your phone, see the requirements and instructions below.
Disclaimer
The instructions in this guide are intended for use of Samsung Galaxy S3, model numbers GT-I9300 and GT-I9300T. Applying these instructions on another device or model may produce undesired outcomes.
The information in this guide is provided for instructional and educational purposes only. There is no guarantee that these instructions will work under your specific and unique circumstances.
Use these instructions at your own risk. We shall not hold any responsibility or liability for whatever happens to you or your device arising from your use of the info in this guide.
Read and understand the whole guide first before actually performing the instructions.
Requirements
Samsung Galaxy S3 GT-I9300 or GT-I9300T
A Windows PC
Phone drivers installed on the PC. You can get the drivers by installing Samsung Kies. Or, get them from any of these links: 32 bit(x86)-Windows |64 bit(x64)-Windows .
Enable USB debugging on your phone.
Disable system tools such as firewall program, anti-virus software, and Samsung KIES to avoid interruptions throughout the procedure.
Backup all personal data on your phone to make sure you have a copy of your personal data (e.g., contacts, SMS, MMS, Internet settings, Wi-Fi passwords, and the like) in case the procedure in this guide erases such data.
Make sure that your battery has sufficient power (at least 50%) to avoid interruption due to power loss.
Download the following to your computer.
Odin3 v-1.85 (Odin3-v1.85.zip, 198 kB
Cf-Root 6.3 (CF-Root-SGS3-v6.3.zip, 7.1 MB)
Instructions
Extract CF-Root-SGS3-v6.3.zip to your computer and you will get CF-Root-SGS3-v6.3.tar.
Extract the Odin3-v1.85.zip file into a folder on your computer to get Odin3-v1.85.exe. We recommend you extract it to the Desktop where you can easily find it.
Turn off your phone.
Put your Samsung Galaxy S3 into Download Mode by pressing the Volume Down key, Home button (middle key), and Power button together, then press the Volume Up button right after the screen turns on to finally enter Download Mode.
Connect your Samsung Galaxy S3 to your computer via USB cable.
Go to the folder where you extracted Odin3-v1.85.zip and double-click Odin3-v1.85.exe to launch Odin on your computer. You will know when Odin recognizes your phone if you see an “Added” message in its lower-left message box. If your phone is not recognized, there is something wrong with the installation of the drivers, so disconnect the phone and re-install them.
In Odin, click the PDA button and select the CF-Root-SGS3-v6.3.tar file that you have downloaded earlier.
Under Options, make sure that “Repartition” is not checked.
Click the Start button in Odin3 to flash CF-Root 6.3 on your Samsung Galaxy S3 and wait for it to finish.
Once the flashing is done you will get a “PASS” message with a green background on Odin, indicating that flashing is successful. You may disconnect your phone from the computer at this point.
Your phone will automatically reboot into ClockworkMod Recovery and the rooting procedure will begin, after which your phone will reboot once more into Normal Mode. If the phone doesn’t boot into ClockworkMod Recovery, it’s possible that the rooting process failed. In that case, go through the steps again starting at step 3.
Great! You have successfully rooted your Samsung Galaxy S3 GT-I9300 or GT-I9300T and flashed ClockworkMod Recovery. You can now flash custom ROMs on your phone.
32 bit-Windows-x86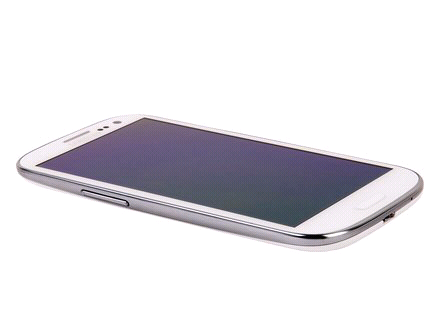
Doing those could be complicated, not to mention very risky–but not anymore! There is now an easier and faster way to root your device and install Clockworkmod Recovery at the same time. The tool is called CF-Root 6.3.
Just after the release of the new Samsung Galaxy S3, recognized XDA Developers member Chainfire posted a method on how to root the device. The said method was effective enough to root the device, but some users found it very complicated and confusing, not to mention that it didn’t include ClockworkMod Recovery. That earlier method employed flashing an insecure kernel prior to installing root and SuperSU.
This time, Chainfire came up with a new rooting package called CF-Root 6.3, which makes the rooting process easier than the previous one. All you need to do is to flash the package on your phone via Odin and it’s done.
It’s also better because flashing the package also automatically installs ClockworkMod Recovery, SuperSU (root access manager), and the ClockworkMod Recovery Manager app. It’s definitely the most recommended way to gain root access on your Galaxy S3 because it’s faster, easier, and safer.
If you want to flash this package on your phone, see the requirements and instructions below.
Disclaimer
The instructions in this guide are intended for use of Samsung Galaxy S3, model numbers GT-I9300 and GT-I9300T. Applying these instructions on another device or model may produce undesired outcomes.
The information in this guide is provided for instructional and educational purposes only. There is no guarantee that these instructions will work under your specific and unique circumstances.
Use these instructions at your own risk. We shall not hold any responsibility or liability for whatever happens to you or your device arising from your use of the info in this guide.
Read and understand the whole guide first before actually performing the instructions.
Requirements
Samsung Galaxy S3 GT-I9300 or GT-I9300T
A Windows PC
Phone drivers installed on the PC. You can get the drivers by installing Samsung Kies. Or, get them from any of these links: 32 bit(x86)-Windows |64 bit(x64)-Windows .
Enable USB debugging on your phone.
Disable system tools such as firewall program, anti-virus software, and Samsung KIES to avoid interruptions throughout the procedure.
Backup all personal data on your phone to make sure you have a copy of your personal data (e.g., contacts, SMS, MMS, Internet settings, Wi-Fi passwords, and the like) in case the procedure in this guide erases such data.
Make sure that your battery has sufficient power (at least 50%) to avoid interruption due to power loss.
Download the following to your computer.
Odin3 v-1.85 (Odin3-v1.85.zip, 198 kB
Cf-Root 6.3 (CF-Root-SGS3-v6.3.zip, 7.1 MB)
Instructions
Extract CF-Root-SGS3-v6.3.zip to your computer and you will get CF-Root-SGS3-v6.3.tar.
Extract the Odin3-v1.85.zip file into a folder on your computer to get Odin3-v1.85.exe. We recommend you extract it to the Desktop where you can easily find it.
Turn off your phone.
Put your Samsung Galaxy S3 into Download Mode by pressing the Volume Down key, Home button (middle key), and Power button together, then press the Volume Up button right after the screen turns on to finally enter Download Mode.
Connect your Samsung Galaxy S3 to your computer via USB cable.
Go to the folder where you extracted Odin3-v1.85.zip and double-click Odin3-v1.85.exe to launch Odin on your computer. You will know when Odin recognizes your phone if you see an “Added” message in its lower-left message box. If your phone is not recognized, there is something wrong with the installation of the drivers, so disconnect the phone and re-install them.
In Odin, click the PDA button and select the CF-Root-SGS3-v6.3.tar file that you have downloaded earlier.
Under Options, make sure that “Repartition” is not checked.
Click the Start button in Odin3 to flash CF-Root 6.3 on your Samsung Galaxy S3 and wait for it to finish.
Once the flashing is done you will get a “PASS” message with a green background on Odin, indicating that flashing is successful. You may disconnect your phone from the computer at this point.
Your phone will automatically reboot into ClockworkMod Recovery and the rooting procedure will begin, after which your phone will reboot once more into Normal Mode. If the phone doesn’t boot into ClockworkMod Recovery, it’s possible that the rooting process failed. In that case, go through the steps again starting at step 3.
Great! You have successfully rooted your Samsung Galaxy S3 GT-I9300 or GT-I9300T and flashed ClockworkMod Recovery. You can now flash custom ROMs on your phone.
32 bit-Windows-x86


